Every RingOffice Small Business Cloud Phone System includes a feature rich enterprise grade Unified Messaging service. This RingOffice Cloud Phone System Voicemail User Guide will focus on how to use and manage Voicemail features from your VoIP phone as well as from the RingOffice Small Business Phone System customer portal.
Accessing Voicemail from your VoIP Phone
The short dial code to access your Voicemail Inbox from your phone is *98. Most phones can be configured to dial this shortcut via the built-in “Messages” key. This allows you to enter your own Voicemail Inbox with a single key press. Once logged into your Voicemail Inbox, you can follow the intuitive voice prompts to listen to and manage your voice messages.
Managing Voicemail Greetings from your VoIP Phone
Dial into your Voicemail Inbox (by pressing the Messages key or dialling *98). Then press 3 to manage your Personal Options and again press 3 to record/set your desired greeting. There are 4 greeting options you can set from this menu: Extended Absence, Personal, Name, Standard (generic system default greeting).
Voicemail Password
By default, no password is needed when dialing *98 from your phone to check your voicemail. However, if a password is set for added security or when dialing in to remotely check messages from an external number, then you will have to enter the default voicemail password (check with your solution consultant if you are not sure of your password). To change this password, dial *98, press 3 for Personal Options, then press 2 for Administrative Options, then press 1 to change your password.
Voicemail System Menu from an Internal Extension
If you need to access voicemail messages for a line or extension that is not configured on your phone such as a department or general company mailbox, then you will need to call into the Voicemail System menu. The short dial code *97 can be dialled from any extension to access the Voicemail System menu. When dialed, the system will ask you to enter your account number (enter your 3 or 4 digit extension number followed by # sign) followed by your voicemail password.
Voicemail System Menu from an Outside Line
External access to theVoicemail System Menu is an optional feature for customers who wish to check their voice messages by dialing in from an external number. If this feature is configured on your RingOffice Cloud Phone System, then dial into your system and enter the Voicemail System Menu Extension number assigned to you (ask your Solution Consultant if you don’t know this). The system will ask you to enter your account number (your full SIP account number may be 6-9 digits long) followed by your voicemail password.
Voicemail Notification/Retrieval Methods
Each extension’s voicemail feature can be setup to work using 4 voicemail notification/retrieval methods, called ‘Actions’ in your External Email settings. These settings can be changed from the RingOffice Customer Portal.
• None: All messages are stored in your Voicemail Inbox only so you can only check these messages by dialling into your Voicemail Inbox from your phone. Your phone Message Waiting light (if your device supports it) will indicate you have messages so you can check them from your phone. With this setting, you will have to periodically check/delete messages from your phone Voicemail Inbox to avoid your mailbox from filling up. A full inbox will not allow new messages to be recorded.
• Forward: Voicemail messages are not kept in your Voicemail Inbox (so you can’t listen to them from your phone) and instead they are attached as audio files and sent to your email address. When using this setting, please make sure these messages are marked as safe so they do not end up in your spam or junk folders. The benefit of this method is that you do not have to check messages from your phone and do not have to delete them from your Voicemail Inbox either. This way your Voicemail Inbox never fills up.
• Copy: In this method, a copy of your messages are stored in your Voicemail Inbox (so you can listen to them from your phone) and a copy is also forwarded as an audio attachment to your email address. Your phone Message Waiting light (if your device supports it) will indicate you have messages so you can check them from your phone. With this setting, you will have to periodically check/delete messages from your phone Voicemail Inbox (even though you may have deleted it from your email) to avoid your mailbox from filling up. A full inbox will not allow new messages to be recorded.
• Notify: In this method, an email notification is sent to inform you that you have a new message but the audio file will not be attached to this email. Your phone Message Waiting light (if your device supports it) will indicate you have messages so you can check them from your phone. With this setting, you will have to periodically check/delete messages from your phone Voicemail Inbox to avoid your mailbox from filling up. A full inbox will not allow new messages to be recorded.
Unless specified otherwise, RingOffice Cloud Phone System Extensions will be configured with notification method “None” if no email was provided for the extension at the time of signup or notification method “Forward” if an email was provided with the extension at the time of signup. You can ask your RingOffice Phone System Solution Consultant to setup your preferred method at the time of extension setup or later. The designated administrator within your company can also do this for you through the RingOffice Customer Portal.
Changing Voicemail Notification/Retrieval Method
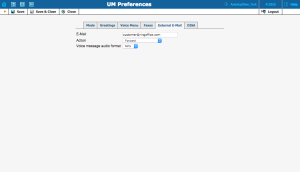
To change your Voicemail Notification/Retrieval Method, you can log into the RingOffice Customer Portal and selecting your extension account. Under the Extension Account, click on the “Service Features” tab, then click “Incoming Calls” and then click “Manage UM”. This will open up the Unified Messaging Inbox for your Extension. Here you will see your Voicemail Inbox which will contain your messages. If you click on UM Preferences from the Menu options bar, you will find a tab for External E-mail. Here you may set your email address(es) and preferred notification method. Don’t forget to save after you have made changes on this screen.

Account UM Preferences External Email
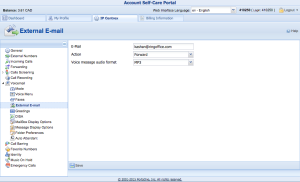
If you are an End User and have access to the RingOffice Account Self-Care Portal, then simply go to the “IP Centrex” tab and click on “Voicemail” from the menu on the left and then click “External Email”. There you can set your email address(es) and preferred notification method. Don’t forget to save after you have made changes on this screen.

Account Self-Care Portal / IP Centrex / External Email
* Please note that some IP phones may have built-in feature codes that conflict with these shortcuts. If you find such a conflict, you will need to disable the code in your phone settings in order to use the above shortcuts.
Was this article helpful?
That’s Great!
Thank you for your feedback
Sorry! We couldn't be helpful
Thank you for your feedback
Feedback sent
We appreciate your effort and will try to fix the article